Tuesday, August 20, 2013

Raving About Rosemary!

If you asked me to name my top ten Essential Oils, in terms of usage, Rosemary would be in the top five for sure. It is one of my most frequently used oils and one that I never let myself run out of.


“There's rosemary, that's for remembrance. Pray you, love, remember.” 

William Shakespeare, Hamlet


Rosemary


Rosemary...


how do I love thee?

In the words of Elizabeth Barrett Browning....

Let me count the ways....


  1. I love a drop in my shampoo(homemade recipe) You can also just add a drop to your bought shampoo.
  2. I love it in my after shampoo rinse. (Camp Wander's recipe for Lavender Rosemary Rinse)
  3. I love it in my nasal rinse recipe.(recipe here) 
  4. I love it in a Lavender & Rosemary Calming Spray.(20 drops each EO in 2 oz spritz bottle topped with water)
  5. I love it in my Invigorating Body Spray.(recipe here)
  6. I love it in my Saline Nasal Spray.(recipe here)
  7. I love it in my thicker hair blend.(Camp Wander's Recipe)I forgot this one....this is an update!

There's more, those are just the ways I love it best!


About Rosemary:


Spark Naturals Rosemary is from the botanical family rosmarinus officinalis and grown in Italy.

Description: Most popular for its culinary uses, Rosemary also has the ability to stimulate hair growth, boost mental activity, relieve respiratory problems and reduce pain.

Properties: Analgesic, Antidepressant, Anti-Stringent, Carminative, Cephalic, Diuretic, Stimulant, Hypertensive

Historical Uses: Rosemary has been used to clear the mind and nervous system & stimulate memories; the diuretic properties have been useful in reducing water retention during menstruation, obesity and cellulite..

Use compresses and baths when trying to sooth stiff joints, arthritis, or rheumatism.  Use diffusion or other methods of inhalation when treating colds, flu, and as a mind stimulant.  Rosemary is certified as GRAS by the FDA and can be taken internally.  Rosemary has had positive effects being applied neat or with a carrier to the scalp, face, or neck for skin or hair/scalp disorders.  

More uses for Rosemary Essential Oil:

Add a few drops to mouthwash to help with halitosis.
Apply topically in areas of sore muscles, headaches or arthritis.
Inhale or use aromatically to aid with congestion, allergies, cold sores, sore throats or flu.

Rosemary Essential Oil Blends well with: 
Frankincense, Lavender, Sage, Peppermint, Geranium, Lemongrass

Rosemary Essential Oil Application:
Can be use aromatically
Can be consumed
Can be used topically (Apply NEAT)

Precautions:  Consult professional advice before use by those who are pregnant or nursing mothers.

You can find Pure Pharma Grade Rosemary Essential Oil at Spark Naturals.

Remember to use the coupon code PATTI at checkout for 10% off your order. Shipping is always $6.49 per order.

‘As Rosemary is to the Spirit, so Lavender is to the Soul.‘

-  Anonymous


patti


Friday, August 9, 2013

Paleo Wheat, Gluten & Dairy Free Zucchini Bread

I ran across this fabulous blog called Elana's Pantry She has recipes for all sorts of special diets. If you are restricted in any way, you should pay her a visit. I found a Paleo Bread recipe on her site that I have adapted to accommodate my special diet. I would never have known where to even start however without first finding a recipe that someone else had already proven, so I am very thankful for blogs like Elana's. 

This recipe is wheat, gluten and dairy free!


Paleo Zucchini Bread


I especially like this recipe because you just dump it in the food processor a few ingredients at a time, pulse, pour into your pans and bake. How easy is that? 

I wanted a little more volume to my bread because of the loaf pans that I had, the original recipe made a low loaf, very delicious, but not a large slice. So, I added two grated zucchini, they add volume without changing the taste much at all. If you want a banana bread, use one small zucchini and one banana per recipe, it's delicious! Remember I doubled my recipe so I used two medium sized zucchini this time.

I'll try to make this as simple as I can, but I made several substitutions to her original recipe because of my food allergies and sensitivities. I am allergic to egg whites, so I try to limit my egg intake. I used ground flax seed in water in place of half the eggs.(I doubled Elana's recipe). 


One TBS ground flax seed & three TBS water = one egg


I am sensitive to coconut, so I used Tapioca flour and Extra Light Olive Oil in place of the coconut flour and oil. I also have to limit my vinegar because of being extremely sensitive to yeast. Anything fermented is not a good thing. I used balsamic vinegar, it's aged instead of fermented. I'm not really supposed to have honey either, but hey...I gotta cheat a little sometimes. I love honey!


A gathering of everything.


All the ingredients


Remember I have adapted Elana's recipe to fit my diet, if you want to follow hers you'll need to follow the link at the beginning of this blog.

One more thing before I get into the recipe. I ground my own almond flour from plain almonds. If you do this you'll want to sift the flour before you blend it with the other ingredients. There will always be a few contrary chunks of almonds in there. I don't mind a little nuttiness in my bread, but I don't want big chunks. If there are some small pieces, I just throw them in there anyway. This bread will also be a dark bread because the almonds are ground with the brown coating still on the almonds, blanched almond flour is ground from the inside of the almond without the brown coating.


Paleo Zucchini Bread


This recipe makes two small loaves or one large

3 cups almond flour
4 TBS Tapioca or Coconut flour
1/2 cup flax meal
1/2 tsp sea salt
1 tsp baking soda
5 eggs 
5 TBS ground flax seed/meal in 15 TBS water( this takes the place of 5 eggs) If you can have the eggs, just use ten eggs if desired.
2 TBS Extra Light Olive Oil or Coconut Ol
2 TBS Balsamic or Apple Cider Vinegar
2 TBS Honey


Dry Ingredients
  1. Place almond flour, tapioca/coconut flour, flax, salt and baking soda in a food processor
  2. Pulse ingredients together
  3. To substitute flax seed for half the eggs, mix 5 TBS ground flax seeds with 15 TBS water in measuring cup or bowl
  4. Pulse in eggs, flax & water mixture, oil, honey and vinegar
  5. Pulse in grated zucchini and banana if desired*(see special note below before doing this step)
  6. Pour batter into a greased loaf pan. You can make two small loafs or one large with this recipe.
  7. Bake at 350° for 45/55 minutes or until toothpick inserted in middle comes out clean. This will have a moist center unless you cook it longer. You'll have to be careful and not let it brown too much on the bottom and sides. If you cook this as one large loaf, it may take longer to cook.
No room for zucchini
*SPECIAL NOTE: Depending on the size of your processor, you may not be able to fit this double recipe in. I couldn't. I had to remove half the mixture after step 4 in order to add the zucchini. I poured half in a mixing bowl, pulsed the zucchini in the processor, then mixed it all in the bowl before pouring into the pans.


Batter ready to pour into pans


Nothing left to do but eat it!


Hope this give you some ideas on how easy it is to make your own bread even if you can't have wheat! This recipe is especially good with a banana included too. You can even add a few chopped walnuts and you have banana nut bread!
patti


Thursday, August 8, 2013

Accidental Almond Nut Butter

A few weeks ago I posted a  blog on "milking almonds", dehydrating the pulp and making my own almond flour. You can read it here:

How Do You Milk An Almond?

I'm not making as much almond milk these days but I am making more bread using almond flour, or meal as some refer to it. I decided that I would just try milling the dry almonds to see if I could make my own flour. I had a jar full of roasted, salted(sea salt) almonds that weren't being used so I thought, "why not?" 


I'll give it a try and see what happens. I fully expected to turn out some great, yet a bit salty, almond flour.

Famous last words as they say...... 

What I got was an unexpected treat. I accidentally made almond nut butter. It was a bit dry so I added some Extra Light Olive Oil and it was pretty tasty. I even managed to make me a substitute peanut butter and banana sandwich. That was a treat!

I am allergic to wheat and very sensitive to yeast, so I cut out all bread a few years ago. I've not eaten a sandwich in about three years now.

I miss them....

I never realized how easy it is to make bread from other sources than wheat. However, that is for another blog that's coming up soon, pinky promise! This one is about my accidental discovery of a super delicious substitute for peanut butter. I'm also not eating peanut butter right now because of another eating lifestyle that I am undertaking, the Paleo diet. Peanuts aren't nuts, they are legumes, and not an accepted food on the Paleo Diet. I am far from educated on the Paleo diet, I'm just beginning to learn, hopefully I will be posting more on this later also

Meanwhile, back to the experiment!

I decided to try this again and take pictures this time, in case you've never tried to make almond nut butter. It's super easy, a little messy, but then most things in my kitchen are when I'm the one doing the cooking.

What you'll need:

This makes about 4 ounces of almond nut butter, if you want to make more, simply double the amounts.

One cup roasted, salted(sea salt) almonds
1/2 to 1 tablespoon oil of your choice(I used Extra Light Olive Oil)
A Magic Bullet or food processor or something similar with a good grinding or milling blade that will grind nuts
One cup measuring cup
1/2 or 1 TBS measuring spoon

What you'll need


You will need a Magic Bullet or something similar. I have not tried this in a food processor or blender, but you could give it a try. I made a very small amount. If you're making more, your food processor would likely work.

One note here before you try what I did thinking it would work better. I tried adding the oil to the nuts before milling. This did not work well at all. I've found that it works best if you mill the almonds first by themselves.

Process:


Place one cup of roasted, salted almonds in Magic Bullet or processor, mill as well as possible. 

Almonds in Magic Bullet


You will  find that the butter tends to cake up around the blades and the top of the container if you're using a Magic Bullet. Simply stir it back down and grind again.

Ground almonds cake up around the top


I also found that some of the nuts just refuse to grind, so I take out the butter that is smooth, place into a small bowl.....

First run


and put the chunks back into the grinder.  After grinding as well as possible, I remove the rest of the butter to the bowl, add the oil and mix. I actually put the mixture back in the Magic Bullet, changed to the blending blade and let it blend it really well for me. 


I used one tablespoon of oil for one cup of almonds, because you have to keep this in the fridge, and it will get thick. You may want yours thicker, if so, then cut back a bit on the oil. 

One Tablespoon Olive Oil


Then I placed it in a jar(or course I did)!

4 ounces of Almond Nut Butter


 And there you have your yummy almond nut butter. 


It's very tasty with just the right amount of saltiness for me. 

Now I have to go make more bread....I need a sandwich!


patti


Tuesday, July 30, 2013

Wondrous White Fir Essential Oil

If I had to list my top five favorite Essential Oils and Blends, I'm not sure just where White Fir would rank, but I'm sure it would be pretty high up on the list. 


If you can be in love with an Essential Oil, I am in love with White Fir! 

It had me at hello....well, at first sniff anyway! 


White Fir Essential Oil


I use it in my deodorant, several of my diffuser blends, my arthritis blend and anything else I can get away with using it in. I especially love to diffuse it with other woodsy oils, such as Cypress, Frankincense and Birch. I know that Birch's main scent is a mint smell, but if you give it a chance, you'll catch the wood smell in there too...it is from a tree after all, you know!

Now that we've cleared that up, however, on to White Fir! 

Description: 

White Fir is distilled from white fir needles, this oil has a crisp scent and comes from Austria. White Fir is a powerful anti-oxidant with a high ORAC score. It has been use for deodorants, disinfectants, rubefacients and stimulants. 

If you're wondering what on earth ORAC is, it is the "oxygen radical absorbance capacity", which measures the free radical destroying potential of a particular food. 

Properties:

Analgesic, Anticatarrhal, Antiseptic, Anti arthritic, Stimulant

Historical Uses:

White Fir essential oils have been used for tense muscles, fever, chills, coughs, and help with the body's natural defense system.

Possible Uses:

Diffuse to fight airborne bacteria, germs and to stimulate the mind while allowing the body to relax. Apply topically to reduce aches from cold and flu and exercised muscles.

Application:

Can be used aromatically and topically(apply NEAT)


White Fir is very reasonably priced with Spark Naturals at the following prices:

 5 ml bottle - $6.99
15 ml bottle - $18.00

Also, with coupon code PATTI, you get an additional 10% off at checkout! 

Fabulous deal for a fabulous oil!

White Fir can be substituted for Frankincense in most cases, and it has been referred to as the Poor Man's Frankincense.

Here are three of my favorite ways to use White Fir, my Arthritis Blend, My Walk in the Woods Diffuser Blend and my Woodsy Winter Day Diffuser Blend.

Arthritis Blend

A Walk In The Woods Diffuser Blend


Woodsy Winter Day Diffuser Blend

If you don't have this oil, give it a try! You'll find it will quickly become a very often used oil I bet! If you do use this oil, I'd like to hear your favorite way to use it.


patti


Tuesday, July 23, 2013

Birch is Back!

Breaking News on Birch!


Betula Lenta~Sweet Birch


BIRCH IS BACK!

Birch Essential Oil will be available on the Spark Naturals website as of 8 a.m. MDT Wednesday, July 24.


The supply is again limited, remember this is a very hard to find oil. Don't miss out on this opportunity to buy the best pain relieving Essential Oil available!


BIRCH ESSENTIAL OIL

Betula Lenta


How exciting! Birch Essential Oil is very hard to find these days but Spark Naturals has found a source and is making it available for purchase.

This is NOT A LIMITED TIME OFFER, however, supplies are limited, so from time to time, inventory may run low and the oil may have to be backordered. Don't take any chances, get yours now!

This species of Birch is Betula Lenta(Sweet Birch).  It's aroma is similar to Wintergreen. It blends well with citrus and woodsy oils.


Click on price link below to order your Birch today!


Be sure and use coupon code PATTI at checkout for an additional 10% off your order.


USES:

BODY - Sweet Birch is mainly used to treat joint and muscle pain. It has powerful pain relieving, anti-inflammatory and anti-spasmodic properties that are beneficial for conditions such as lumbago, sciatica, neuralgia, gout and fibromyalgia, etc. It can be used in massage blends and is also often added to liniments and ointments to help ease aches and pains. It can also be used in inhalations for respiratory conditions to open the airways, clear the sinuses and stimulate the mind (blend with Eucalyptus for this). It has detoxifying and diuretic properties, helps to stimulate the circulation, improves digestion, and can reduce fever by promoting perspiration.

MIND - Sweet Birch can be help to stimulate the nervous system and lift feelings of depression. It can be invigorating and uplifting.

SKIN - Often used in preparations for problem skin conditions and as a skin softener. It has an astringent action and can be used as a skin toner to tighten the pores and to reduce wrinkles and saggy skin. It also has antiseptic, disinfectant properties that can protect the skin from bacterial and fungal infections. 


Properties

Analgesic
Anti-inflammatory
Antiseptic
Antispasmodic
Disinfectant
Diuretic
Stimulant

Good For

Arthritis
Bone spurs
Cramps
Diuretic
Eczema
Gout
Hypertension
Joint pain
Muscle pain
Psoriasis
Skin toner
Tendonitis


Sweet Birch should be applied only topically and aromatically. It should never be taken internally. 


Precautions - Sweet Birch Oil may cause skin irritation. It should always be used with caution and in the correct dilution. Its main constituent is methyl salicylate (the active ingredient in aspirin) so it should not be used on anybody who is sensitive/allergic to aspirin, has liver problems, is on blood thinning medication, has epilepsy or is subject to seizures. It should also be avoided with children or the elderly and while pregnant or breast feeding. 

A summary of information is gathered from several sources and articles by various authors and it is not intended to replace advice or attention from competent healthcare professionals.

Monday, July 22, 2013

Woodsy Winter Day Diffuser Blend

I don't know about you, but I've never been a big fan of Summertime. Of course I enjoyed not going to school for three months when I was a kid, but I do remember being so glad when those crisp Autumn days started showing up. It meant Winter wasn't far behind.

Walking in the woods was always a peaceful experience for me, even as a child. I've always loved the trees and since I was raised way out in the country in the middle of the deep Piney Woods, I suppose it's just natural that I love the woodsy scents so much.

Well, it's still the middle of a normal, hot Texas summer and I can only dream of Winter....and diffuse a little Winter feeling and atmosphere in my home.

If Summertime heat has you longing for a crisp, cool late Autumn or Winter day, try this blend in your diffuser. The Cypress and White Fir are such lovely woodsy scents and the Birch adds the crisp coolness to the blend with just a hint of the woodsy in there too.

I'm pretending it isn't 90+ degrees outside and there are no weeds to be pulled from the flower beds. So far it's working.....haven't thought about those weeds but two times today.

Woodsy Winter Day Diffuser Blend


You could also add a few drops of Frankincense to this blend, it also has a wonderful pine smell. If you were unable to get the Birch, you might try Peppermint, Spearmint or Wintergreen in place of the Birch. It will be almost as good!

It's not Winter, but this sure helps makes the summer heat a bit more bearable until Winter finally rolls back around.

You can purchase these oils at Spark Naturals. 

Be sure and use coupon code PATTI at checkout for an additional 10% off your order.

Unfortunately, Birch EO is temporarily out of stock at Spark Naturals, but as soon as it is available, you'll be among the first to know!


patti


Wednesday, July 10, 2013

Making Your Own Almond Flour and Almond Flour Tortillas

I'm pretty sure some of you are asking why I don't just buy the almond flour. That's one option, of course, but since I'm making my own almond milk, I have the pulp and it seems like a waste to just throw it out when it can be used in this way.

If you're not familiar with the Whole30 eating plan, it is a plan to rid your body of anything that can cause inflammation. That includes all dairy, grains, sugars and many more items. The almond milk you buy in the stores has some sort of sweetener in it, so it's not acceptable for 30 days. This eating plan literally resets your system and flushes all the toxins out of your body. It also breaks the addictions we have to these harmful products.

As promised, Part 2 of the Almond Milk journey....

In a previous post about how to make almond milk:

How To Milk An Almond...


I left you with a picture of my almond pulp dehydrating and a promise to share my recipe and very messy method of making tortillas from the pulp.

Before we can make the tortillas, we have to make the flour. Some people call it meal, but I try to grind mine fine enough I can call it flour.

Pulp in dehydrator


This really worked out better than I thought it would, the pulp does tend to fall through the holes, but since the bottom is solid, it can't escape. You just spread the wet pulp around as well as you can, it will be in lumps of course, but it will dry nicely.

Dehydrated Pulp in large container ready to grind.

Since the dried pulp is so easy to lose in transfer, it's best to have large container to shake it off in. I use one of these handy busing pans that they use in restaurants to clear the tables. You can find these at Sam's Club. They're one of the best purchases I've ever made, they come in handy for so much.

The Flour Making


Add small amount of dried pulp to blender

I choose to grind the dried pulp in my blender rather than the food processor in order to get it as fine as possible. I find putting about a cup or two of pulp at a time is the best way.

Sometimes you get a dust storm in there.


Stirring the flour away from the blades

I take the handle of a long wooden spoon and loosen the flour that has settled around the blades and then blend some more. Make sure the blades have stopped completely before doing this please!  You'll want to blend this on the highest speed you have.

Finely ground Almond flour
The finished product....a finely ground flour that used to be almonds that you've already used to get milk from, and now they're working for you again! You are definitely getting your money's worth from these almonds.

Almond flour in a jar

You can freeze the pulp and grind later, but I like to do mine as often as I make the almond milk, we're eating a lot of these tortillas around here, I'm gluten free and several relatives and myself are on the Whole30 where you can't eat any grains. This is like totally awesome to us. Seriously!


Making the Tortillas


Assemble the ingredients


Assemble your ingredients


3 cups Almond Flour
1 cup Tapioca or Coconut Flour
(I can't have the coconut, so I use Tapioca, it works well for me.)
4 teaspoons Olive or Coconut Oil
(again, can't have coconut, so I use an alternative)
1 cup Warm Almond Milk
2 teaspoons Sea Salt


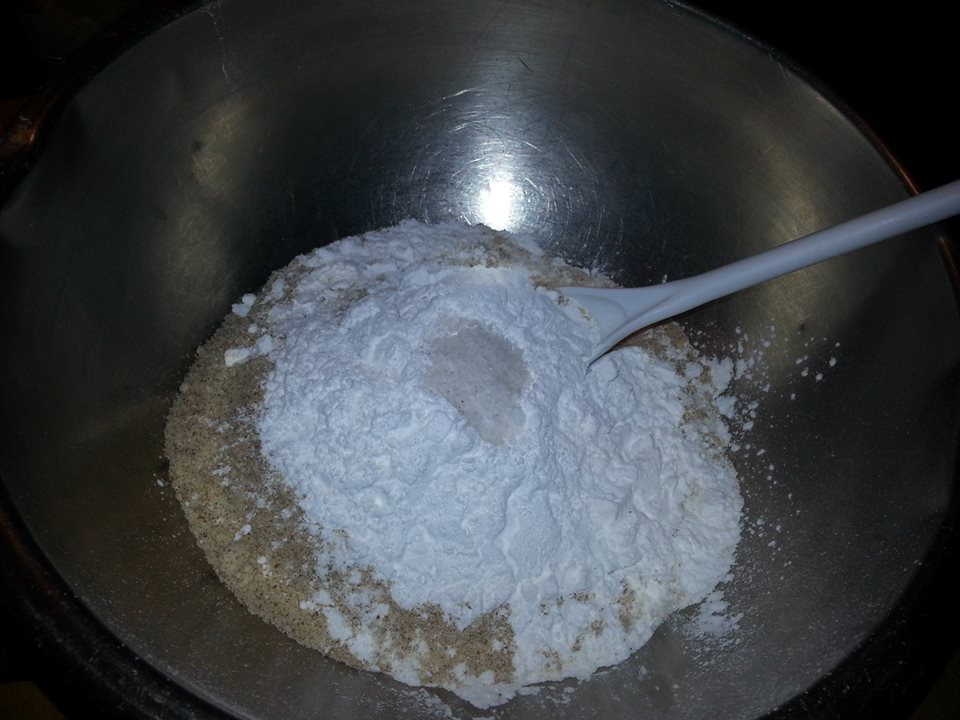
Mixing the dry ingredients
In a large bowl mix your flours and salt together and mix. 


After the oil is added
Add the oil and mix. It should look something like this.


I have to confess....I forgot to take a picture after I mixed the milk, so you'll have to use your imagination here, ok?

After mixing the previous ingredients well, then add the cup of warm almond milk and mix well and form into a ball.


A nice almond flour dough ball
Turn the ball of dough out on a well floured board, I use the tapioca flour to coat the board. Knead the dough for about two minutes.


Back in the bowl to rest for 30 minutes
Put the kneaded dough ball back into the mixing bowl and cover with paper towels or a dish towel and let set for about 30 minutes.


And the fun begins!


16 pieces of dough ready to roll

Once again, I forgot to take a picture, the one where I show you how to separate the dough. Use that imagination again here. I take a sharp knife and cut the ball into two parts, then cut those two pieces into two parts, and so on until I have 16 pieces. If you want to make really big tortillas, you can cut eight pieces. I recommend staying small with these, because they are a little hard to handle if they're too big, and sometimes they tend to fall apart while you're working with them.

Let me just say this here...never in a trillon years would I have a cooking show, BUT if I did...I'm pretty sure they'd call it 


A Southern Mess


So, I'm warning you, these pictures are gonna get messier as we go on. I tend to be covered in flour when I'm finished with these.


My very messy cutting board filled with very messy tortillas

Take each little dough ball and mash each one down with your hand and then with a very well coated rolling pin, shape into the best tortilla shape you can get. You can see from these that some look way better than others. I'm more concerned with getting them to stay in one piece here than how they look. Some recipes call for an egg or two, but I'm allergic to egg whites, so that's not an option for me. Some call for honey, but honey is a no-no on the Whole30.


This one needed a little extra help

Sometimes you have one that just refuses to co-operate so I just give it a little spritz with my homemade non-stick spray(olive oil and water). They usually straighten up and act right after this.


Spraying the grill

I cook my tortillas on my stove top grill, you can use a large iron skillet or an electric grill. I keep my non-stick spray handy to spray each time before placing the tortillas on the grill. Start your grill on high, but if they start getting too brown, you'll need to adjust the heat. I usually turn it down on low before I'm finished.

Tortillas on the grill...one nice, one messy! That's the story of my kitchen.

 As you can see, some end up with a little too much flour, but no worries, they're still yummy!


16 ready to eat warm Almond flour tortillas

The finished product. When you can't have bread, these are seriously worth the trouble and the messy kitchen that you end up with.

We're thinking up all sorts of things to do with these....I'm thinking chicken pot pie, some sort of fruit roll, etc. They have a sweet nutty taste, but not a strong one, they are really very, very good.


Adron, aka Boy....he's a bit messy too. He takes after his Nana I think!

I had a helper in the kitchen today, my grandson, Adron. He loved the tortillas and he actually ended up with less flour on him than I did. He's a great helper, but he doesn't have an off switch if you know what I mean!

In simpler terms, here's the recipe


3 cups almond flour
1 cup Tapioca or Coconut flour
2 tsps sea salt
4 tsps Olive or Coconut oil
1 cup warm almond milk

In a large mixing bowl, combine the dry ingredients, mix and add the oil. Mix and then add the warm milk. Form into a ball, turn out on a floured board and knead for two minutes. Place back into the bowl, cover and let sit for 30 minutes. Turn out onto floured board, with a sharp knife, cut ball into 16 evenly sized pieces. Taking one at a time, press the ball to flatten slightly, then with a well floured rolling pin, roll into tortillas of desired thickness. On a hot griddle or large cast iron skillet sprayed with non-stick spray, place the tortillas, brown quickly, turn and brown other side and remove with a spatula to a plate.


Note: If you want to make these with regular flour(which isn't really good for you, you know) simply use four cups regular flour and no additional flours. You will also need to increase the milk amount to 1 1/2 cups. You can use regular milk if it's acceptable to you. 


Ole! 


I think that's Spanish for Enjoy!

patti